As part of the items that we need to prepare for our survival kit, we need to have the basics: food, water, shelter, and heat.
In this article, we will discuss a very famous tool that you can use to produce two of the basics mentioned: food and heat – the rocket stove.
A little help from science will help you along the way. With a rocket stove, you will also be able to heat water and disinfect it from pathogenic bacteria, protozoa, and viruses.
Rocket stoves have several versions you can build depending on the materials that are readily available to you. In this article, we will discuss everything there is to know about the good ‘ole rocket stove.
What Is A Rocket Stove?
Simply, a rocket stove is a small, highly efficient stove. You can readily use this heating tool with fuel sources that you can find in your environment. Examples of these are the following:
- Wood
- Small branches
- Twigs
- Dried leaves
- Pinecones
You may use several other fuel sources as long as it quickly catches fire and is small enough to fit the rocket stove’s chamber. It is important to note that these fuel sources are gathered rapidly and, more often than not, free.
These are some of the reasons why most preppers would love to have this in their arsenal of tools. Rocket stoves are also relatively cheaper to build and easy to maintain.
Typically, rocket stoves burn the fuel source in a small chamber and have chimneys where smoke can escape. The design ensures that you get the maximum heat output that is best for cooking and producing warmth. Rocket stoves also produce more heat than a typical wood stove or a traditional fire pit.
The modern version of the rocket stove came to be during the 1980s. Its purpose is to provide a means of cooking and producing heat for poorer countries.
Top 10 Rocket Stove Plans
1. Concrete Block Rocket Stove
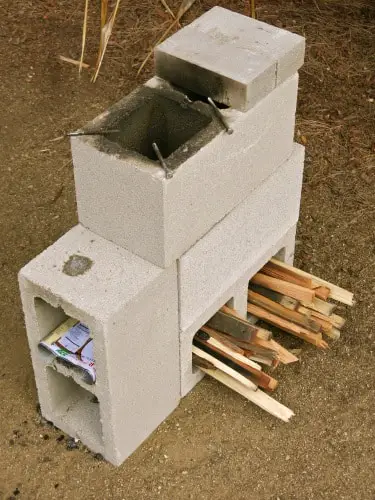
One of the most common ways to build a rocket stove is to use concrete. While it may not precisely be readily available to everyone, or when you are in a survival mode, concrete rocket stoves are still excellent because of its durability.
You have to create molds and purchase cement for this version. It also takes up a lot of time since you will have to wait for the cement to cure and be ready for use.
However, you can create a concrete rocket stove depending on the design you want. Some would shape it into a tiki face to add a coolness factor to it. Being in the outdoors doesn’t mean you can do it in style!
2. Can Rocket Stove

If time constraint is a big issue for you, the tin can may be the perfect rocket stove for you. Since the materials used in this version are easy to acquire and sometimes may even be found in your garage or tool shed, it is not time-consuming.
The materials used are also lightweight and, therefore, can easily be transported. However, in the long run, you may have issues in its durability. Tin cans may rust when exposed to rain.
It can also be dangerous since cans can become hot when exposed to fire. You may get burned if you touch the rocket stove accidentally.
3. Heavy-Duty Rocket Stove
Just like what this rocket stove says in its name, this version is for heavy-duty purposes. As a prepper, you should consider how your tools and other items will hold for the long term.
However, because of the nature of the materials used for this version, weight might be a problem.
Also, it is significantly time-consuming to build from purchasing the materials to designing it and finally welding all the pieces together.
If you want to have a rocket stove without worrying about maintenance, this is the one for you.
4. Brick Rocket Stove
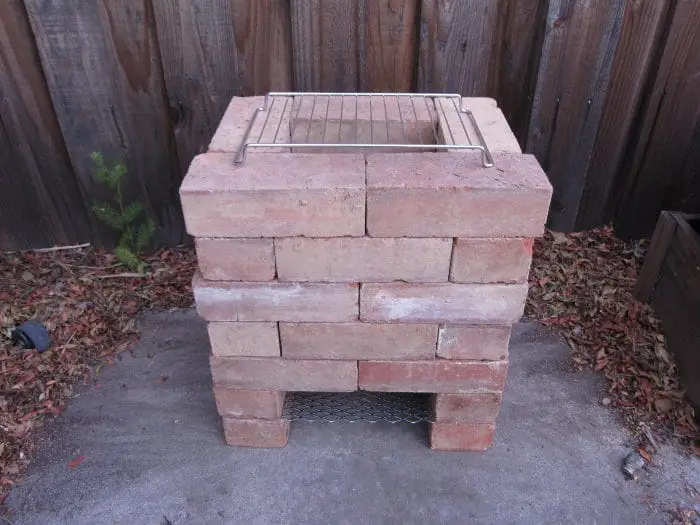
Much like some of the previously mentioned rocket stoves, the brick version is simple to build. All you need are bricks and fuel sources, and you’re good to go.
If you plan to build a rocket stove and install it permanently in your backyard, then the brick version might be ideal for you. Bricks, much like concrete, do not conduct heat and therefore are relatively safer than other thinner materials, e.g., tin cans.
You can also style your rocket stove up using red bricks, which is reminiscent of a cozy fireplace.
5. Cinder Block Rocket Stove
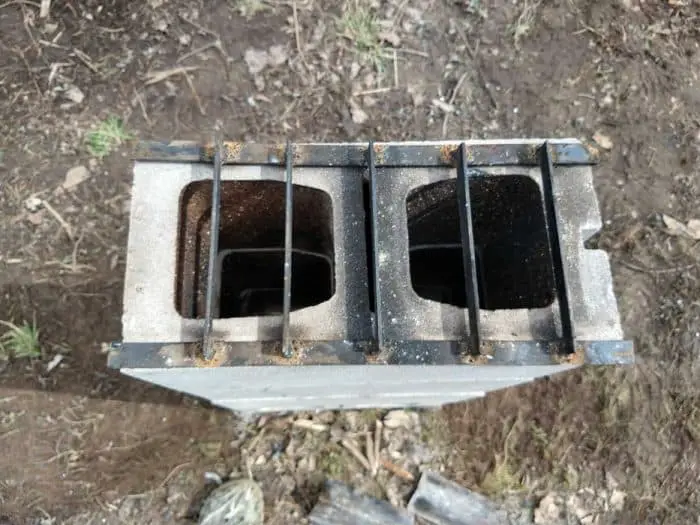
Yes, you read that right, you definitely can use cinder blocks too!
Cinder blocks are just like concrete rocket stoves but are easier to make because they already have readily available compartments. These compartments can act as dividers and, when assembled correctly, serve as a way to feed your flame.
Cinder block rocket stoves need no expensive materials, and you no longer have to wait for it to be built entirely, unlike the concrete version of the rocket stove.
Cinder block rocket stoves are also big enough to cater to bigger pans and pots. Furthermore, if you use enough cinder blocks, you can use up to two pans simultaneously.
6. Sand Rocket Stove
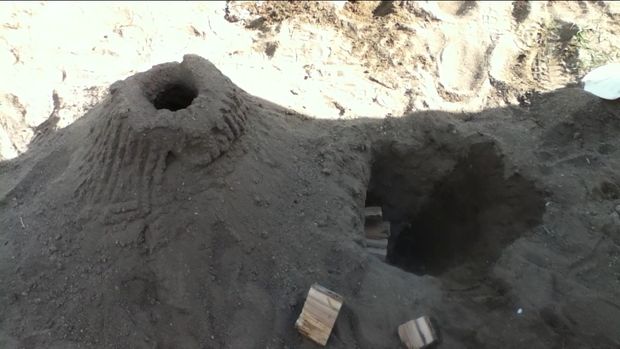
The knowledge in building a sand rocket stove will be highly needed if you find yourself near the seashore and require fire for warmth and cooking. This version of the DIY rocket stove is one of the easiest and cost-efficient ones on this list.
To make your build more sturdy, you can use durable materials for the tube that you need to complete the whole set-up. If you can find a metal tube, it would be better.
However, you need to remember that before using a sand rocket stove, you have to wait for the sand to set, and you have to be careful when digging a pit. Without observing these precautions, your sand rocket stove might not be stable enough.
7. Camping Rocket Stove
This build is one of the sturdier and more heavy-duty oriented ones. However, unlike the previously mentioned heavy-duty rocket stove, the camping version is smaller and, therefore, lighter and better for transportation.
However, the smaller chamber also means you can put a smaller amount of fuel source and, therefore, not produce much heat like the other larger rocket stoves. But since you won’t need to cook big meals during camping, the size is sufficient for its intended purpose.
8. Dual Burner Rocket Stove
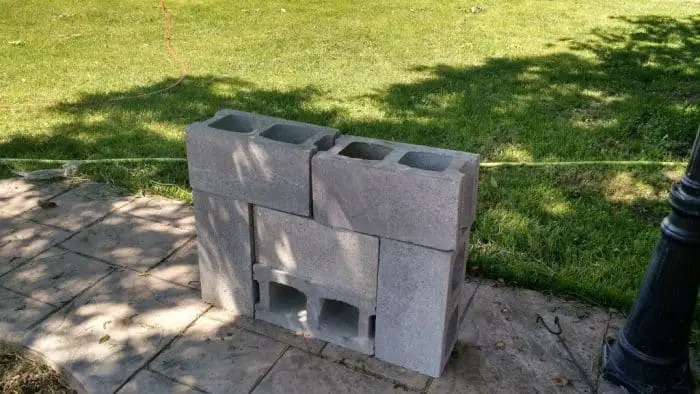
If you’re looking into more durable, easy to build, and functional rocket stoves, then the dual burner version should be on your list. This build is also cost-efficient since it doesn’t require you to purchase expensive materials such as steel. You can assemble it in your backyard without the need of having to weld pieces.
When it comes to longevity, you can rely on the dual burner rocket stove. As long as you use high-quality blocks, you are good to go. You also don’t need to worry if it gets damaged by rain and exposure to liquids, unlike ones made with steel.
9. Metal Rocket Stove

Commonly, you build metal rocket stoves using a cylindrical bucket. The final product will resemble a tin can rocket stove but bigger. And when it comes to heat efficiency, metal rocket stoves are better despite having a bigger surface for cooking.
In an actual doomsday event, you can easily find trash cans and other cylindrical items made from metal. Therefore, knowledge of building one would be beneficial for you.
10. No Materials Rocket Stove
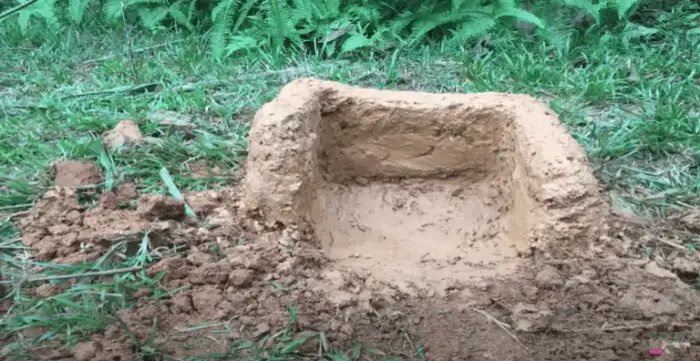
Lastly, we will talk about no materials rocket stove. As it states in the name, you don’t need to purchase any materials for this build.
The advantage of this build versus the sand version is that you don’t need to have a sturdy material to support the structure. You do not have to wait for it to set since soil can be a much more durable material than sand.
All you need is a fuel source that can easily be found and gathered from your environment. This build is ideal for when you are in a situation where nothing is around you but trees, twigs, dried leaves, and stable, dried soil.
How Rocket Stoves Work
To fully understand and appreciate the usefulness of a rocket stove, you need to learn how it works. Also, knowledge of its inner workings will help you build a more solid rocket stove.
As opposed to the traditional wood stoves, rocket stoves do not have moving parts. This feature means it is much less complicated to build since it doesn’t have a fuel damper and air inlet grate.
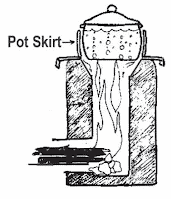
All rocket stoves have the following four essential components:
- Elbow
- Stove body
- Fuel grate
- Pot skirt
Without these four essential parts, your rocket stove will not work correctly.
1. Elbow
This piece is usually made from a non-flammable material and is shaped like an L. Preferably; you need to build it at a 90-degree angle.
The vertical part of the elbow will serve as the chimney and combustion chamber. At the same time, the horizontal piece will be the air inlet and fuel chamber. You will be feeding the fuel source of the rocket stove through the flat part.
2. Stove Body
The stove body serves as the insulation for the elbow. This part of the rocket stove keeps the heat inside and helps keep the furnace at a specific temperature for more extended periods. Without insulation, cold weather might significantly affect the heat produced by the stove.
One of the most effective stove bodies is metal cans and other metal sheets that can be bent to cover the elbow. The top part has a hole to allow the chimney to exit. Another tunnel on the side of the stove body is for accessing the fuel chamber and air inlet.
3. Fuel Grate
What a fuel grate does is lift the fuel source to keep it from touching the lower part of the fuel chamber. This feature allows air to come in and ash to fall off the rack. Ash needs to be collected and removed from the fuel chamber, which burns clean and helps produce more heat.
Ideally, fuel grates should be metal, so it doesn’t burn with the fuel source.
4. Pot Skirt
The pot skirt is commonly known as grill or rack. This part of the rocket stove keeps the pots or pans you use for cooking from touching the fuel source. A space between the chimney and the container is needed to allow airflow since hot air from the flame needs to escape upward.
Pot skirts also help provide more efficient heat transfer.
When you look at your assembled rocket stove, you will appreciate better and understand why it is such an efficient way of providing heat for warmth and cooking. Here’s why:
The fuel source will block most air coming, which means only a sufficient amount of air can enter the fuel chamber. Not too weak or too strong that may cause the fire to die down.
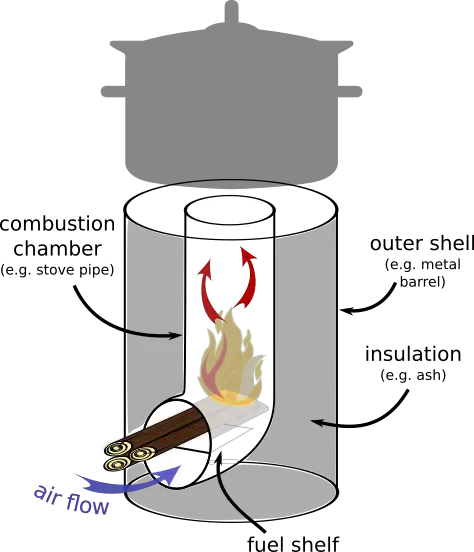
As the hot air escapes upward to the chimney, the rocket stove will continuously have a steady stream of fresh air, which is good for combustion.
Next, the fuel source will only be burning at the tip. This feature does cooking and producing heat more efficiently as the stove will only burn what is needed.
After consuming the fuel source, you will be pushing new fuel sources inward, causing the already burning materials inward. This action will enable you to better control the heat and stabilize at a specific temperature for more extended periods.
Lastly, since the build has a chimney, you can manipulate the direction of the heat to a specific area: the top part of the rocket stove where your cooking pot or hands (if you are using it for warmth) are present.
As long as your stove body is excellent in keeping the heat insulated, your whole rocket stove build will be efficient in producing heat.
What Are The Benefits of a Rocket Stove
There are several reasons why preppers like you should invest in a good rocket stove. This tool can help you survive in the wild, and in any dangerous situation, you might find yourself stuck.
-
Relatively Affordable
Compared to purchasing other tools for heat and cooking, rocket stoves are more affordable. With this in mind, you can opt to add more tools in your survival kit to help you last longer in a doomsday event.
Also, who doesn’t love to save money, right?
-
It Works In Any Size
Depending on your need, you can purchase or build a rocket stove that fits your situation. It will work for a large party, or you can opt to have a smaller-sized one for portability and cost-efficiency.
As long as all the elements of the rocket stove are present, you will have heat for cooking and warmth. It doesn’t matter if you’re using the rocket stove in the outdoors, or you need to install it in your cabin; it will still work.
-
It Produces Little Smoke
Since the rocket stove is going to burn the fuel source efficiently, it produces little smoke. Who would want to inhale heavy smoke while cooking or warming hands, right?
Also, in situations where you need to hide your location, smoke will make you more visible. A rocket stove will produce heat for you, but it also stealthily – something you need when hiding.
-
It Maximizes Your Fuel Source
Maximizing your fuel source is hugely needed when materials are scarce. Since rocket stoves burn efficiently, you will be saving your fuel source and only use up what you need.
How To Make Your Rocket Stove
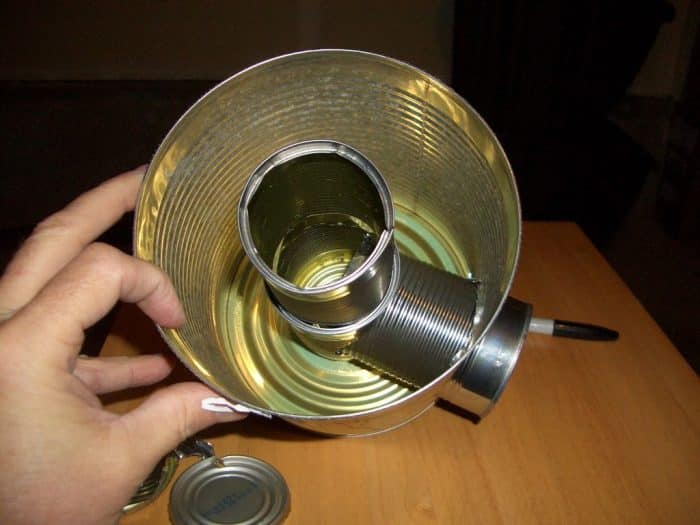
In this example, we will be learning how to build a tin can rocket stove specifically, since it is one of the most common builds and has all the essential parts needed for a rocket stove.
Step 1
Find a No. 10 can and bore a hole on one side. Ensure that the hole is as big as your other smaller can, which is there as a fuel chamber. Use pliers to bend the sharp edges of the hole inside to avoid injury. The no. 10 cans will serve as your stove body.
Step 2
Take a soup can and make another hole on its side. This soup can is the fuel chamber.
Step 3
Cut a hole at the bottom part of a second soup can. Insert this soup can into the hole on the first soup can. The pieces should look like an L. These two parts will serve as the elbow. Remember to insert the first soup can into the stove body first before installing the chimney (second soup can with a hole on the bottom)
Step 4
Extend the chimney by cutting both end parts of a third soup can. Slice the third soup vertically on one side so it can fit on the vertical part of the elbow.
Step 5
Cut a hole on the top lid of the can used as a stove body. Insert the cover onto the stove body and make sure that the hole created will fit the chimney. Then fill the top part of the lid with insulation material, preferably Perlite.
Step 6
Insert the fuel source on the bottom and light it up!
Building your rocket stove is easy and cost-efficient. However, if you want to buy one, you have several excellent options.
Top Commercially Available Rocket Stoves
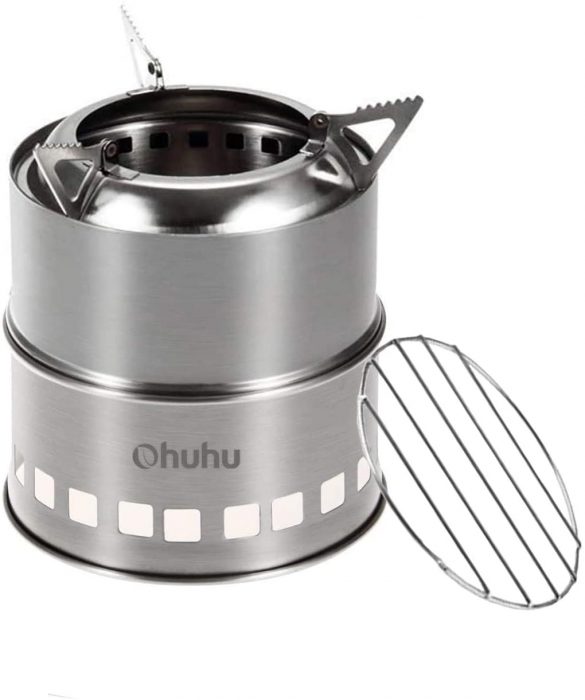
1. Ohuhu Camping Stove
This rocket stove is best known for its portability.
The whole rocket stove is collapsible, which makes it better for transportation. It is from durable stainless steel. You won’t have to worry about rust when in contact with rain and other liquids.
It is also stable and sturdy, which makes it safe to use. Like most rocket stoves, you can use dried leaves, twigs, and other flammable items that are in nature – truly made for camping! Using this camping stove also means you are producing heat in an environmentally friendly way – no alcohol or other chemicals needed that may leave harmful elements.
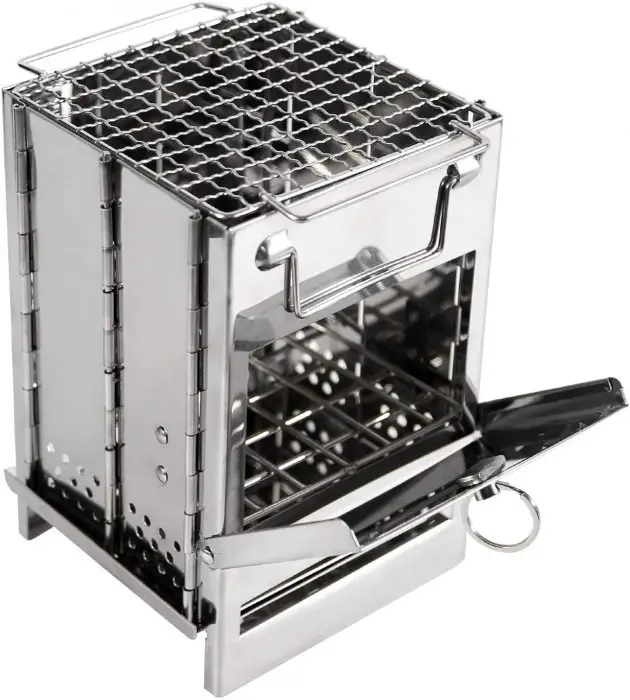
2. Redcamp Wood Burning Camp Stove
This commercially available rocket stove form high quality 430 stainless steel. The cuboid design of this stove helps make it sturdy and stable no matter what happens.
It also accepts several fuel sources present in the environment, e.g., dried twigs and leaves.
The Redcamp Wood Burning Camp Stove comes with its carry bag, which makes it easier to transport. It is also collapsible and lightweight at 1.9lbs.
One good thing when purchasing this item is that the company provides users a 360-day money back guarantee. If you are dissatisfied with the product, you may contact customer service and reply to your concern in 24 hours.
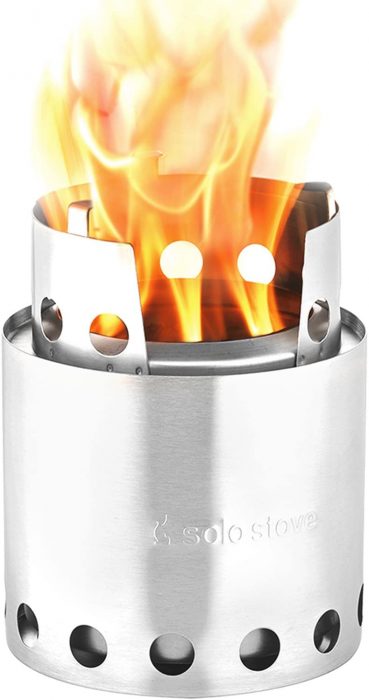
3. Solo Stove Lite
The Solo Stove Lite has a patented design that can produce less smoke versus most rocket stoves. It has a unique double-wall that makes burning the fuel source more efficiently and thus producing less smoke.
Due to the efficiency of this rocket stove in producing heat, it can boil water quickly – 8-10 minutes.
This stove is also lightweight and compact, weighing only at 9 oz. Traveling and camping with this stove will go smoothly!
As proof of its ingenious design, the Solo Stove Lite has also won a Gear of The Year award.
Certainly, a piece of strong evidence that the Solo Stove Lite is a must-have!
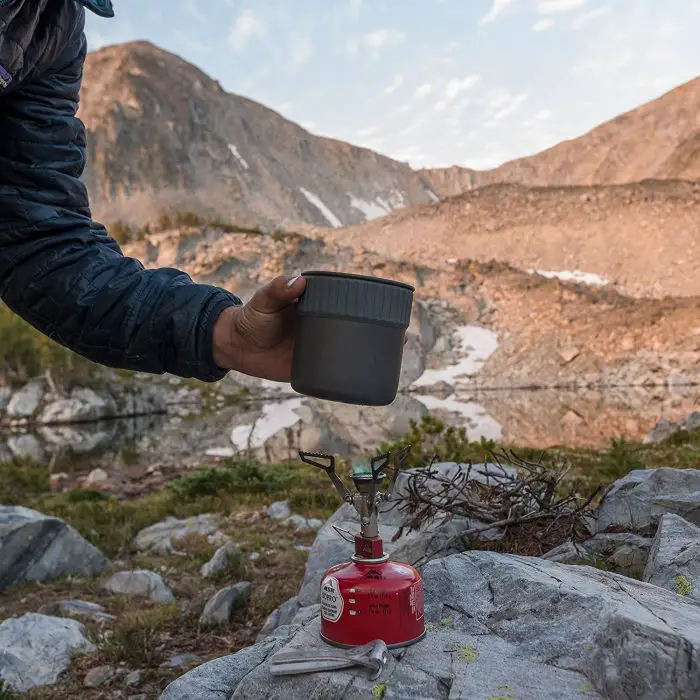
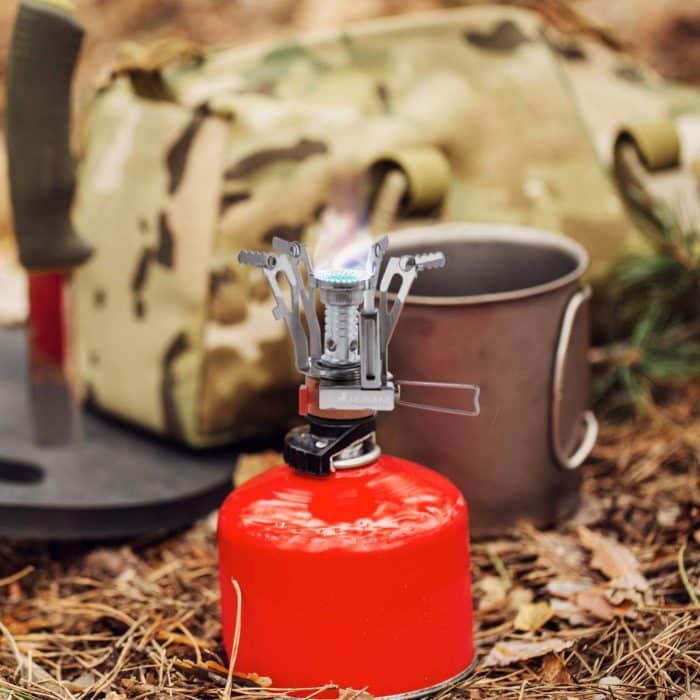
4. MSR Pocket Rocket 2 Mini Stove Kit
This rocket stove is ultra-compact, making it desirable for campers who are living the minimalist life and frequently traveling solo. The MSR Pocket Rocket can boil 1 liter of water on under 3.5 minutes – that’s fast!
This item comes with a pot with insulation, which allows it to be an eating and drinking utensil. You also don’t have to worry about getting burnt since the pan is hot and cold-safe.
Portability is not an issue with the MSR Pocket Rocket since it only weighs 9.9 oz. and can be folded into 4x4x5 inches. The product also comes with a 3-year limited warranty.
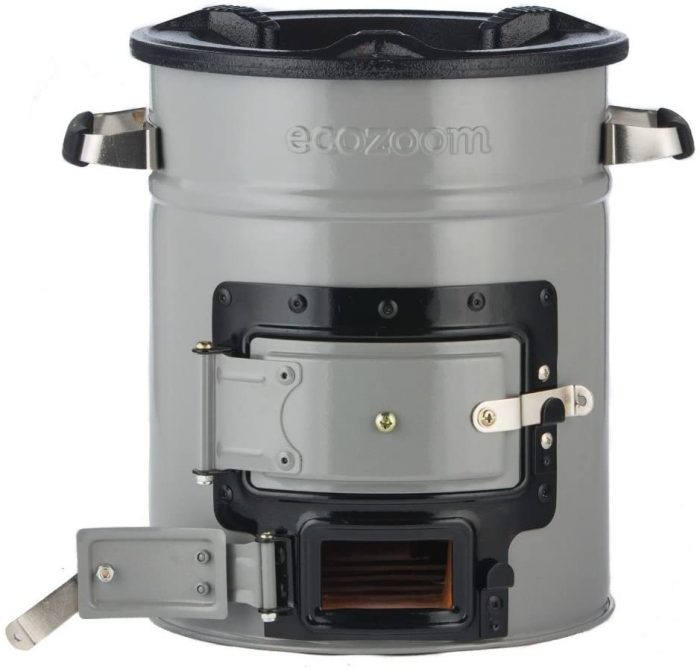
5. EcoZoom Versa Camping Stove
The EcoZoom Versa can use several fuel sources such as charcoal, wood, and solid biomass as the ultimate camping wood stove.
This feature makes it great for camping. Its insulated combustion chamber is fully insulated, which makes it efficient. The insulation also makes it produce less smoke when cooking.
You also don’t have to worry about the EcoZoom Versa accidentally tripping because it is made from high-quality material and optimally to be sturdy. You can easily clean all the parts of the stove.
If you’re looking for an eco-friendly option, you might also consider getting this stove since it doesn’t take a lot of wood and charcoal to cook.
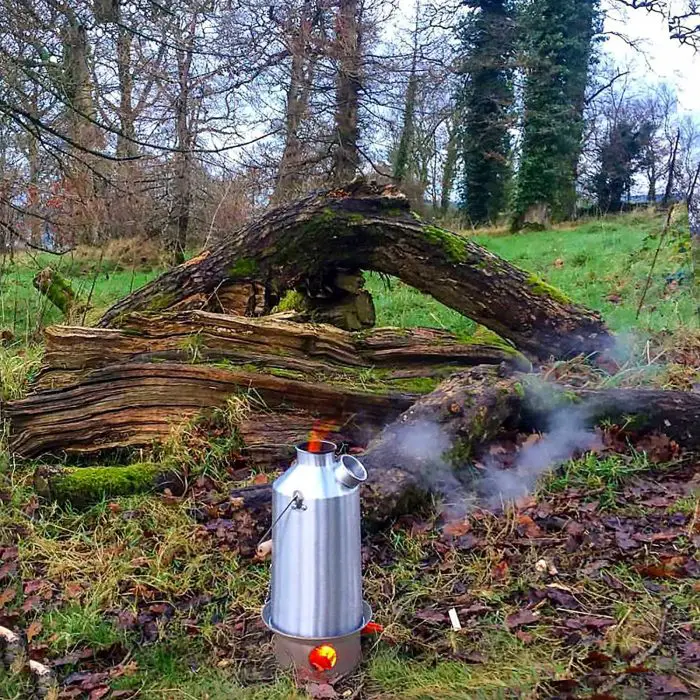
6. Kelly Kettle Camp Stove
This stove is another must-have for outdoorsmen and those who would like to prepare for emergencies. The Kelly Kettle Camp Stove burns fuel sources efficiently so that it can boil water in a matter of minutes.
Just like other rocket stoves in this list, you can also use environmentally-friendly fuel sources. You can save money since you won’t be needing alcohol and other expensive fuel sources, dried twigs, leaves, and wood will do.
This rocket stove can also withstand harsh weather conditions, making it perfect for all-terrain camping and other outdoor activities. The Kelly Kettle Camp Stove also comes with a full money-back guarantee if users are not satisfied with its performance.
Important Reminders For Rocket Stove Users
Remember always to exercise caution when using rocket stoves, whether in the outdoors or within your property. Avoid accidents by all costs through securing your rocket stove in a fixed position so that it doesn’t tip.
Keep in mind also that fire is a hazardous element when left unattended. Ensure that you turn off the flame when you are not using it or when you are going to sleep.
Always be mindful of your waste, and do not use fuel sources excessively.
Happy camping!

