Arrows are pointed weapons launched from a bow. People in various cultures have been using them for a long time now.
During those ancient times, they had to make them from scratch. Now, it’s easier for people who want to make their own arrows because they can buy most of the parts that are ready to assemble.
As a prepper, arrow making is a skill you need to learn not just for survival but for your protection as well. Below is a guide that can help you with that.
Basic Parts of an Arrow
Regardless of the materials used, all arrows still include the following five basic parts.
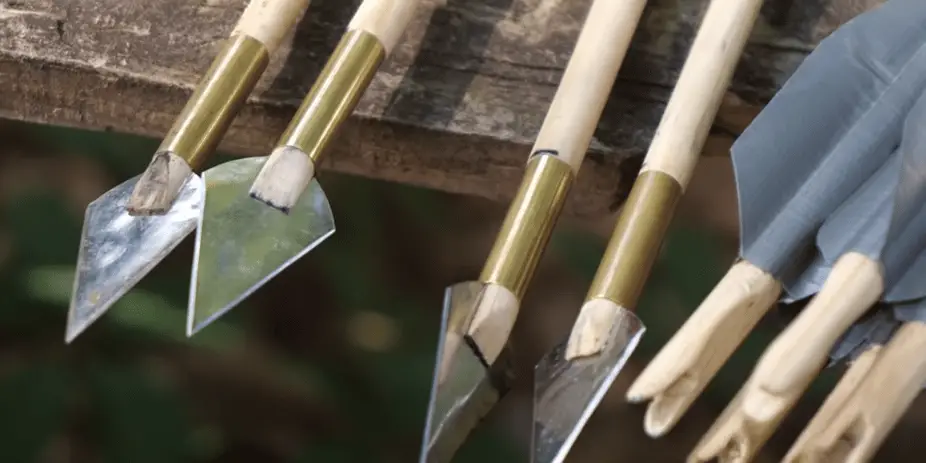
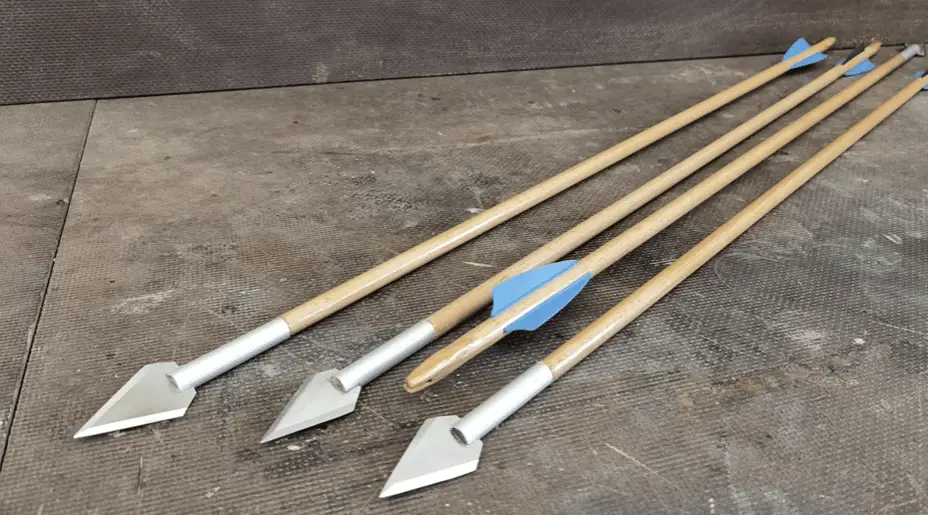
1. Arrow point or Arrowhead
The arrow point or arrowhead is the sharp end or tip of the arrow that is designed to hit the target. They are usually made of metal, stone or any hard material.
There are different styles and types of arrow points. Users select them according to the target they intend to hit with the arrow.
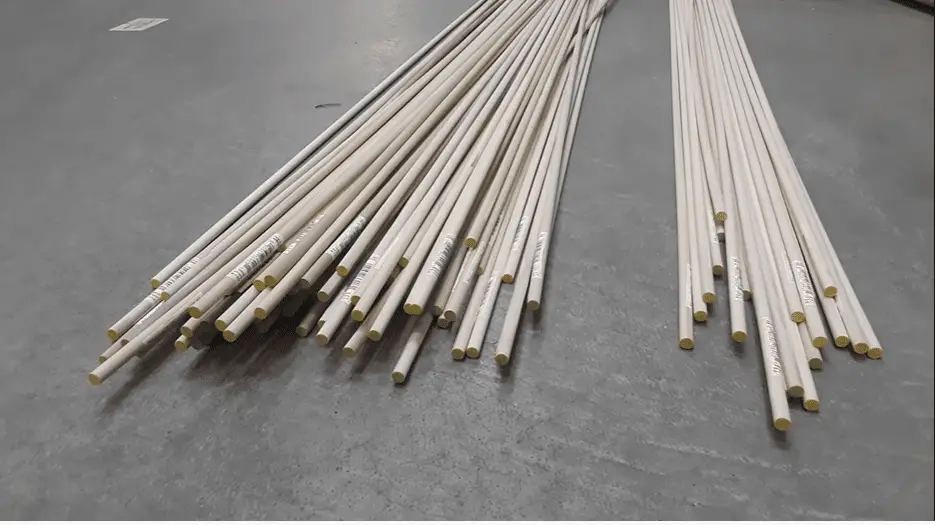
2. Arrow shaft
The shaft is the primary or main structural element of the arrow to which the other components are attached. As the name implies, it’s the long skinny part of the arrow where the arrowhead and the fletching are attached.
Traditional arrow shafts are made from strong, lightweight wood, bamboo, fiberglass, or reeds, while modern shafts may be made from aluminum, carbon fiber reinforced plastic or a combination of materials.
3. Fletching
Fletching is the set of three or four plastic vanes or feathers that provides stability for the arrow and are essential for controlling the arrow’s flight trajectory. It would be difficult to hit a target without fletchings.
4. Nock
A nock is a tiny notch at the arrow’s base or other end from the arrowhead. It serves as the meeting point between the bowstring and the arrow. The nock can be directly made on the shaft end or you can attach a slotted plastic tip.
Steps In Making An Arrow
Anyone interested, even those with no power tools, can make their own arrows based on the following steps:
Gather the Materials and Tools Needed
It is now easier to make your first arrow because you can buy most of the component parts you’ll need. Then, you just assemble them into your arrow. However, some people prefer to make their arrows from scratch because they think it’s more rewarding.
Following are the basic tools and materials you’ll need whether you’ll be making a modern, traditional or primitive arrow.
- Saw – to cut arrow shafts to the desired length
- Arrow Inspector/Spinner – to test the arrow shaft for straightness
- Inserts for attachment of nocks and arrowhead
- Insert Adhesive (Epoxy) or Super Glue – to attach inserts and fletching.
- Arrow Wraps (optional)
- Vanes or duct tape (at least 2 inches wide) for arrow fletching
- Feathers – you can collect from birds and shape yourself or buy shaped or full length
- Fletching Jig – to mount vanes or feathers on the shaft perfectly every time
- Isopropyl Alcohol or Acetone – Clean shafts and vanes before gluing.
- Q-Tips – to clean the inner side of shafts and wipe excess glue with a paper towel or clean cloth
- Material for arrowhead – any material that can be shaped and durable like glass, coins, or even rocks.
- Wood, bamboo, aluminum stick, and other materials for arrow shafts
- String or twine – to help keep feathers on arrow shafts in place.
- Markers
- Knife
- Glue gun
- Hammer and other hand tools to shape arrowheads
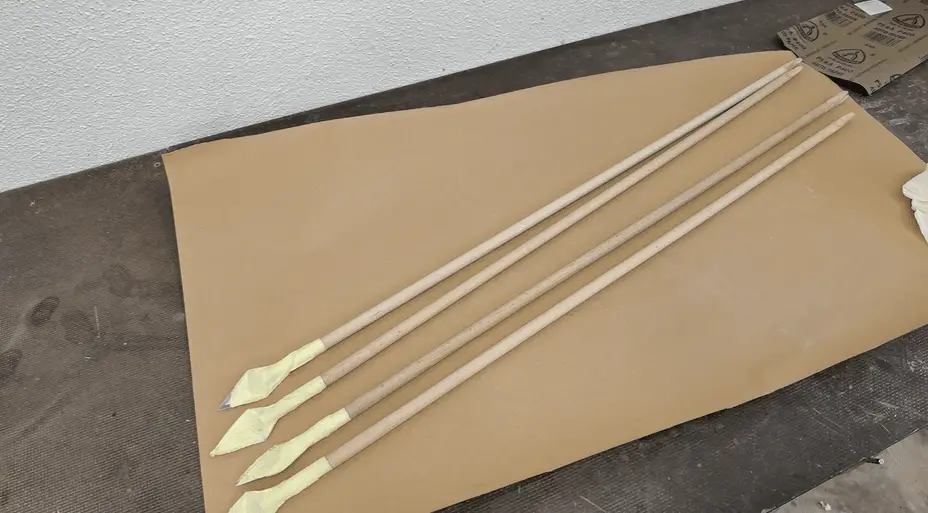
Make the Arrowhead
Making the arrowhead is optional for some arrow makers. You can buy arrowheads and the socket to be used to attach it to the shaft.
1. Sharpen the arrow shaft end.
You can make the arrowhead from scratch by carving the front end of the shaft into a sharp point using your knife. Then, harden the pointed shaft end by heating it in a low fire to avoid burning or scorching the pointed shaft end.
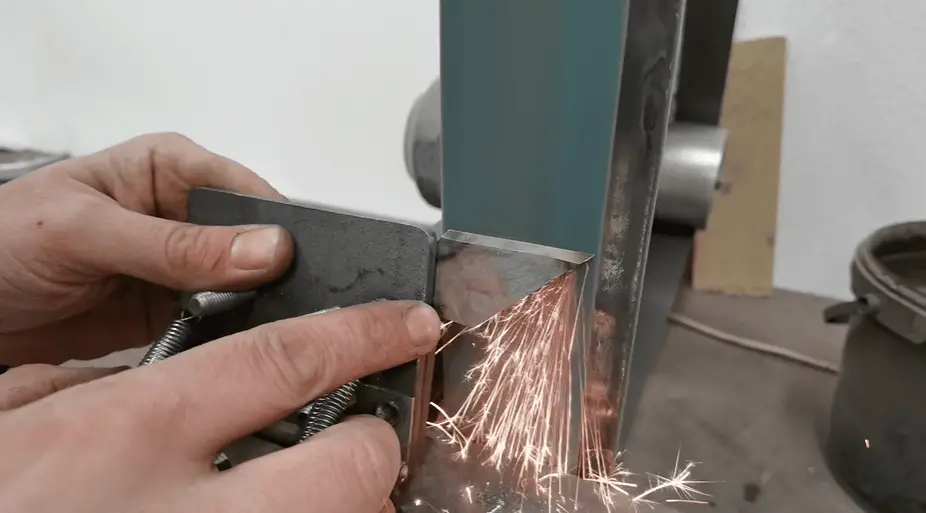
2. Make an arrowhead from scratch.
You can make arrowheads from scratch using any durable material like wood, flint, metal, flat glass, coins, hard plastic or even wide bones and rocks. Then, slowly chip or carve the material to the desired shape.
The base of the arrowhead should have the narrow part to be inserted into the arrow shaft. The tip and the sides of the arrowhead should be very sharp to penetrate flesh effectively.
Prepare the Arrow Shaft
Today, there are a wide variety of materials for arrow shafts that are 45 to 150 cm long. Prepare the materials into an arrow shaft following the steps below:
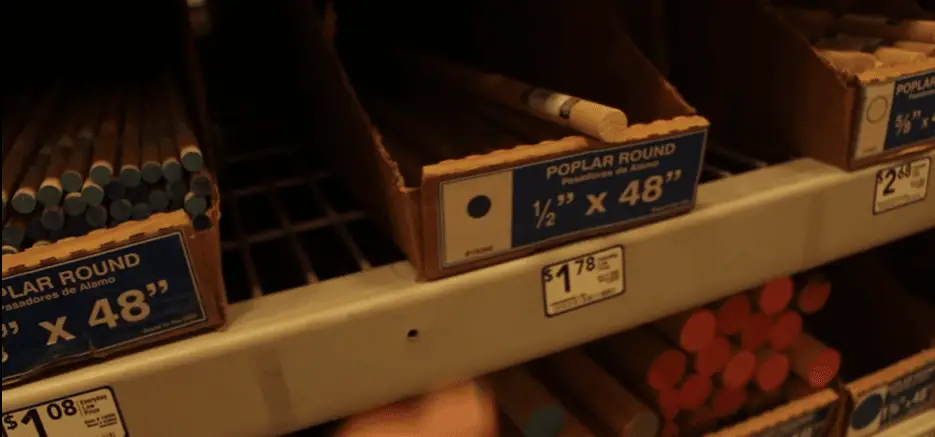
1. Search and choose the sticks for your arrow shafts.
Shop around for available shaft materials. Some hunting and sporting goods supply stores carry a wide variety of straight sticks
You can also consider making your own – look for the straightest stick you can find that is light, sturdy, about 6.5mm or thicker, and at least as long as the distance between your shoulder and wrist. It’s better to start with a longer than a shorter stick.
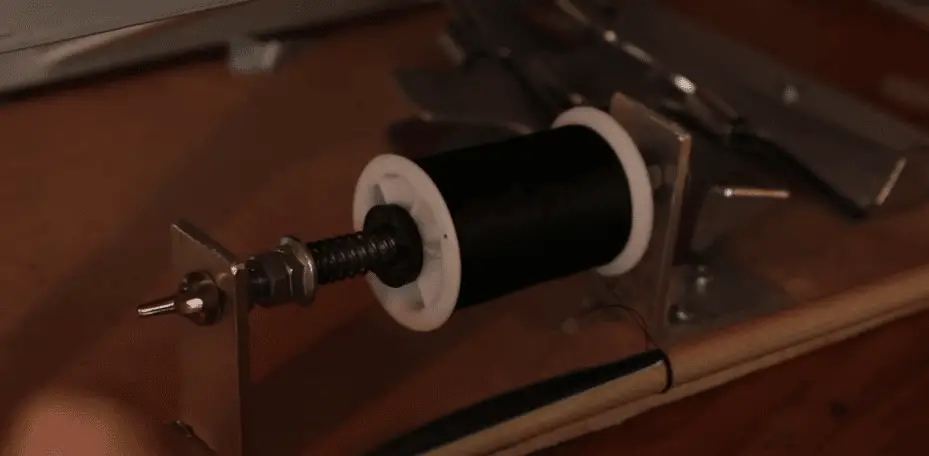
2. Spin test the shaft material.
Before cutting the material for the arrow shaft, spin test it to see if they are straight and balanced.
You can buy an arrow spin tester and spin your arrow. Watch the ends of the shafts as they spin. The end that is more wobbly is the one you want to cut on. Mark that end of the shaft to avoid cutting the wrong end.
You can make an arrow spinner with a cardboard box, about 12-14″ wide. Cut a V on two opposite sides. Place the arrow shafts in the V cut and spin them one at a time.
Straighten arrow shafts by gently heating them over a low fire. Keep the shaft straight while it cools.
3. Cut the shafts to the desired length.
In deciding the length of the arrow shafts, don’t forget to consider the added length of the nock insert and the arrowhead. If you’re using the same bow size, you can use the length of your old arrows as your reference with the necessary allowances added.
If you’re preparing a shaft for a new bow, determine the bow length by drawing it with the uncut stick or shaft material on it.
Then, while holding the bow and arrow shaft, ask someone else to mark on the shaft where you’d like to cut it plus about 1 1/2″ to 2 1/2″ allowance.
Use eye protection before you cut the arrow shaft material with a saw. Roll the shaft as you feed it to the cutting saw.
4. Smoothen the ends of your wooden shaft.
Make the circumference of the shaft end smooth using abrasive material like sandpaper. The shaft end should be smooth to achieve a good fit when you attach the arrow’s point.
This can be an optional step if you’re using ready-to-use arrow shafts as long as the ends are smooth.
5. Clean arrow shaft ends.
You need to remove the dust/debris left over from cutting the shafts on the surfaces where your super glue will be applied before inserting the nock or the arrowhead.
Clean with a Q-Tip, dipped in acetone or isopropyl alcohol. Continue cleaning until the Q-tip comes out clean to ensure better adhesion of the components inserted on the shaft ends.
Attach the Arrowhead to the Shaft
Arrowheads may be attached to the shaft with a slip-on socket or inserted into a split in the shaft end.
Points attached with a socket are simply pushed snugly over the end of the shaft where glue has been applied.
In the other method, split the arrow shaft end lengthwise, attach the arrowhead base and secure it with a string. Coat the string with glue to improve its adherence to the shaft.
Wipe off any excess glue that is still showing after the arrowhead is attached. Then, dry the arrow before you proceed with the next step of the process.
Cover the Shaft with Wrap (Optional)
Wraps are thin pre-cut sheets of material, often vinyl or plastic, used to cover the area on the shaft where you will attach the fletching. Clean the shaft so that the wrap will adhere properly.
Some arrow makers use arrow wraps to increase the visibility of the arrow. Wraps can also make the removal of the fletching easier since it is not attached directly to the shaft.
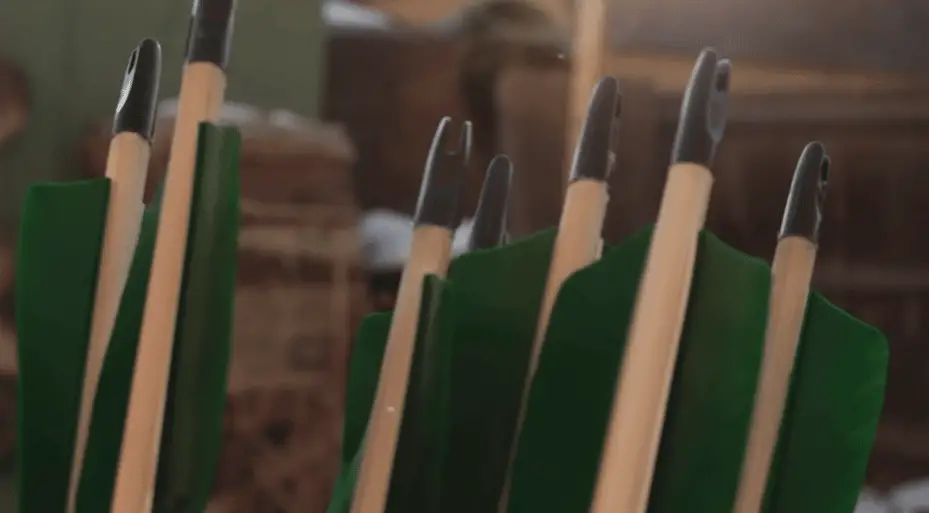
Fletch the Shaft

Fletching is the process of adding feathers, duct tape, small fins, and plastic vanes to the back end of the arrow to ensure it flies straighter. There are other materials you can use as long as they are lightweight.
1. Clean the shaft area where the fletching will be attached.
Clean the shaft with mild detergents or isopropyl alcohol. This is important to ensure proper adherence of the fletching material to be attached.
2. Attach the fletching material
Using fletching jigs – Fletching is much easier with a fletching jig. The jig will allow you to attach the fletching materials securely, accurately and with even spacing. Apply glue on each fletching material, close up the jig and let it sit to let the glue dry.
No fletching Jig – If you don’t have a jig, you can just align and place the fletching material by sight.
You could also split the back of the arrow, slide the feather in, and tightly wrap a thin string around the fletching. This method is suitable for attaching various fletching materials.
Take note that you can still use an arrow without fletching. However, fletchings improve your arrow’s accuracy by stabilizing it as it flies. Fletchings guide the arrow through the air to its target for better accuracy.
Add or Insert the Nock On the Arrow Shaft
The nock is the small notch at the back of the arrow. The nock keeps the bowstring in place.
If you’re using a wooden shaft for your arrow, you can create a shallow nock into the back end of the shaft using a knife. The depth of the notch can be about1/4 of an inch. The measurement may vary depending on the thickness of the bowstring.
There are also commercially-available nocks. They are available with various inserts that will fit over the arrow shaft. Make sure to buy a nock in the correct size so that it fits well on the shaft before you attach it with glue or screws.
Finish the Arrow
When the glue on the different parts of the arrow has dried, you should apply varnishes or lacquers to protect the arrow from environmental elements like rain.
Some materials like wood can absorb moisture while some can corrode without protective finishing. Without lacquer or varnish, your arrow can easily break, particularly if it’s made of wood.
Traditional finishes include paint, varnishes or lacquers. Make sure to use a finishing that is compatible with the glues used to attach the arrowheads, nocks and fletchings.
Some paint and lacquers can dissolve glue. A paint finish can give your arrow a more attractive appearance.
Why You Should Make Your Own Arrows
Knowing how to build arrows is an important survival skill for people who like spending time outdoors and those who want protection. You never know what you will encounter.
Even if you lose the weapon you carry for self-defense, you can continue your journey without feeling weak and helpless.
However, when making one, it’s important that you prioritize your safety. Ask for help if needed to avoid getting a serious injury.
Other tips and techniques for making an arrow:
1. Length of Shaft
Cutting the arrow shaft shorter makes it stiffer. A longer shaft will result in a weaker arrow.
2. Fletching Location
The fletching will steer the arrow better the closer they are to the back of the arrow. Attach your fletching as far back as you can, but would not reach your face at full draw.
3. Arrow Weight
Light arrows are fast and shoot flat or without a drop, making them ideal for straight long-distance shots. However, they create louder noise caused by the energy transferred from the bow during each shot.
On the other hand, heavier arrows can absorb more energy. It creates less vibration and noise. They also penetrate through the target better than light arrows. However, heavy arrows drop faster, making them unsuitable for long-distance shots.
Deciding whether to use light or heavy arrows depends on how you intend to use them.
Conclusion
Building your own arrows will not only save you money, but it can also be fun and rewarding. It also challenges your creativity and resourcefulness since there are many materials you can use and many ways you can make your own arrows
Take note that your bow and arrow are partners. If you want your arrows to be effective, you need to make sure that your own bow is working well.
Your bows should have the right draw length and they should bend evenly and properly when you pull your arrows.
You should also check the bowstring to make sure it won’t break when you apply pulling pressure on it. This is particularly important when you’re using a primitive bow.